How to Integrate Auto Ads of Adsense on Jekyll

In this guide, we’ll walk through the steps to add auto ads from Adsense to your website.

With Auto ads, the integration of Adsense becomes a breeze. There’s no need to manually add ads to each page. Instead, Adsense automatically places ads in optimal locations across your site. This not only saves time but also enhances the user experience by ensuring that ads are strategically positioned.
Prerequisites
Before you begin, make sure you have the following:
- A Jekyll blog that is deployed and publicly accessible (GitHub Pages, Netlify, etc.)
- A Google AdSense account (sign up at adsense.google.com)
- Basic familiarity with your Jekyll project structure
Step 1: Create a New Site
First, you’ll need to create a new site on Adsense.
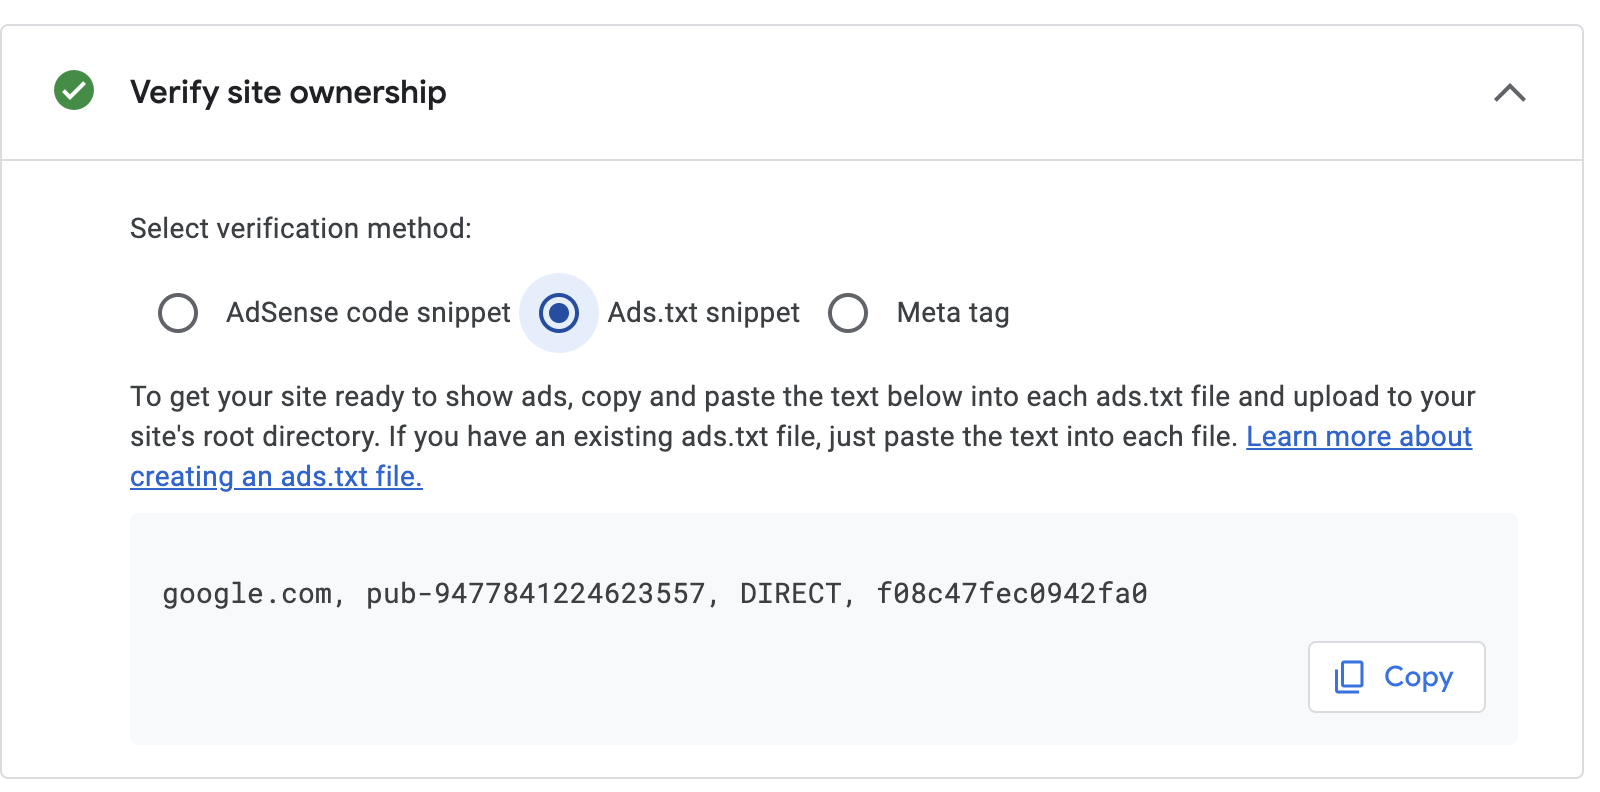
After creating the site, copy the text from ads.txt and create a file named ads.txt at the root path of your Jekyll project. Once you’ve deployed it on the server, verify it.
The ads.txt file is a critical component of the AdSense integration. It helps prevent unauthorized inventory sales and ensures that only legitimate ad networks can serve ads on your site. The file should look something like this:
google.com, pub-XXXXXXXXXXXXXXXX, DIRECT, f08c47fec0942fa0
Make sure this file is accessible at https://yourdomain.com/ads.txt after deployment.
Step 2: Add Auto Ads
Next, navigate to the Ads page and click the edit button.

On this page, you can select the ads you want to display on your website.
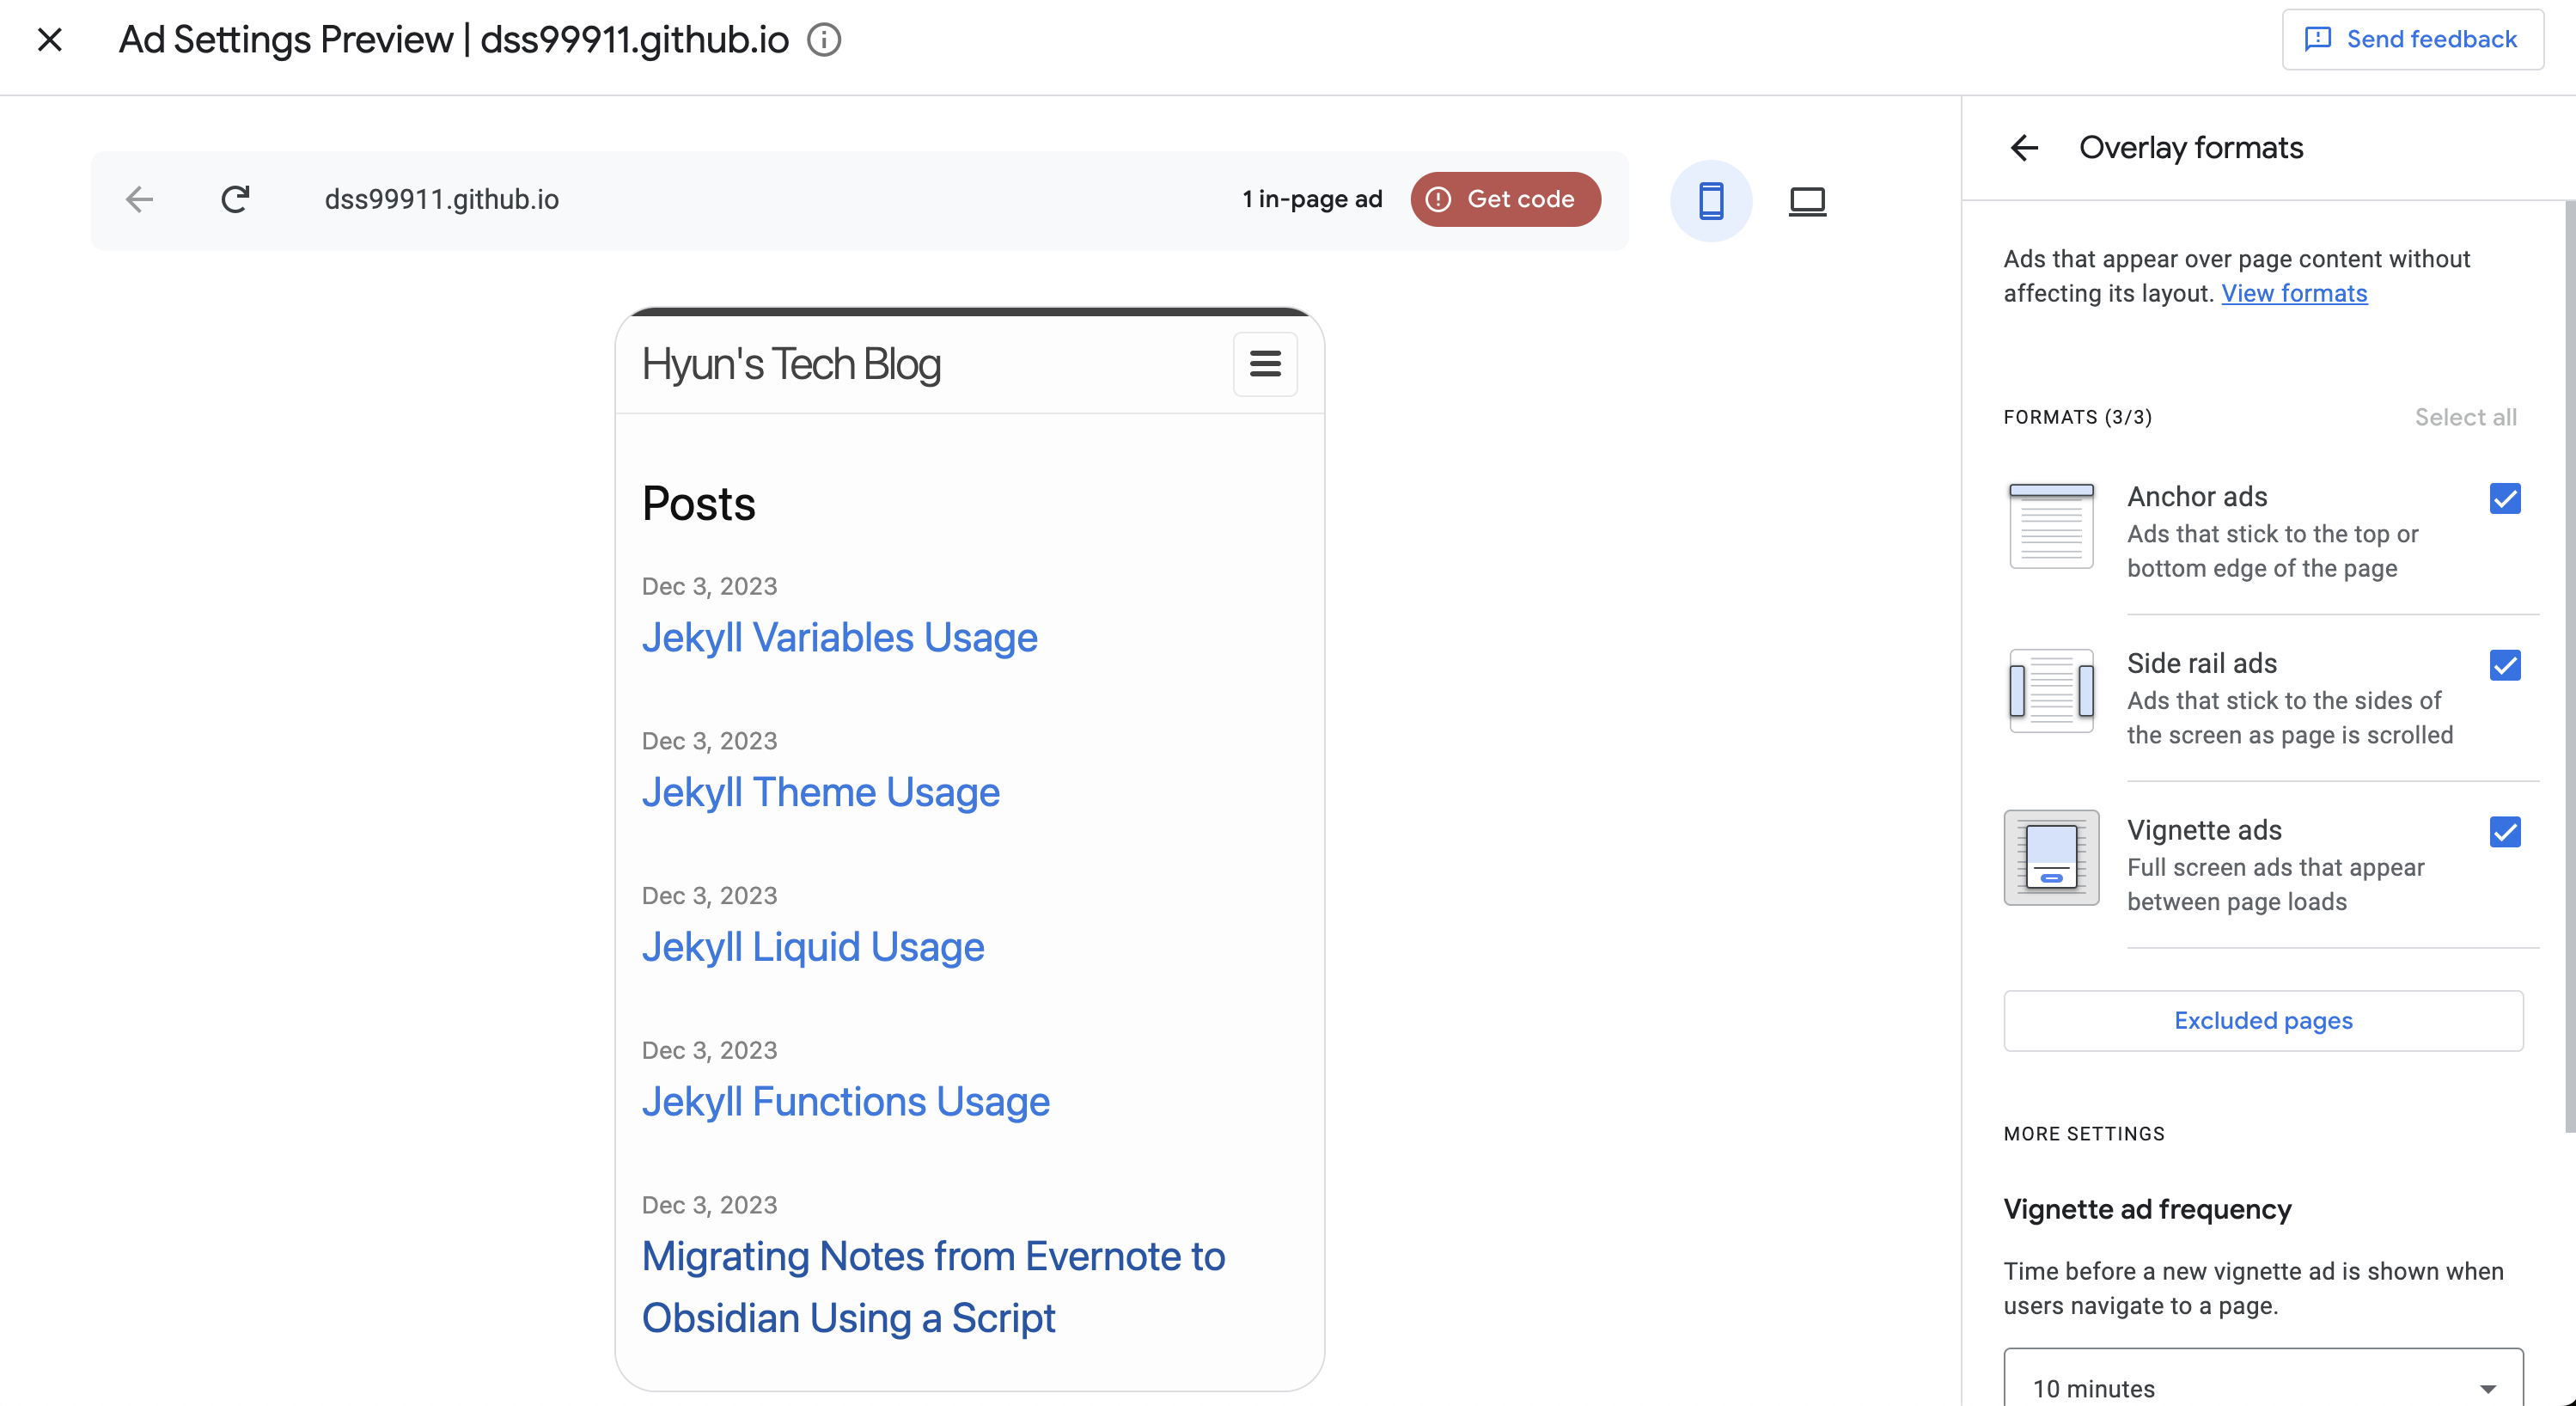
The available auto ad types include:
- In-page ads: Appear within the content of your pages
- Anchor ads: Fixed ads at the top or bottom of the viewport
- Vignette ads: Full-screen ads that appear between page loads
- Side rail ads: Ads on the sides of widescreen displays
Choose the ad types that best fit your site’s layout and user experience. It is generally recommended to start with in-page ads and anchor ads, as they are the least intrusive.
After selecting your ads, click the red ‘Get code’ button.
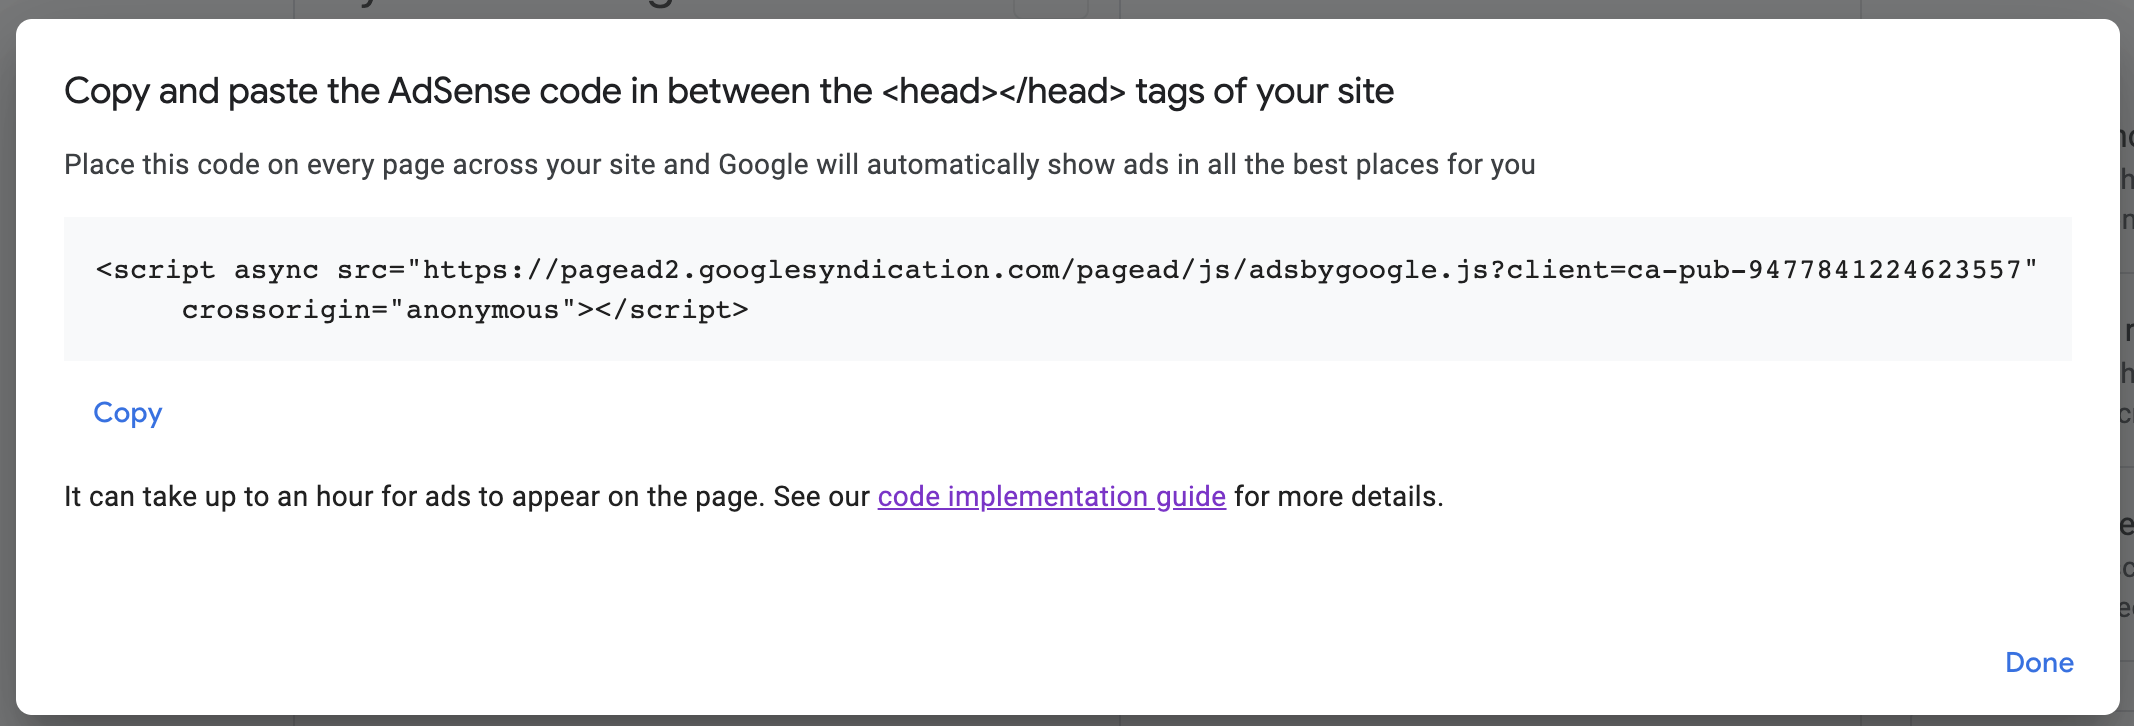
Copy the script and add it to _includes/head.html since head.html is included on all pages. This will ensure that your ads are displayed across your entire site.
The script tag will look similar to this:
<script async src="https://pagead2.googlesyndication.com/pagead/js/adsbygoogle.js?client=ca-pub-XXXXXXXXXXXXXXXX"
     crossorigin="anonymous"></script>
Step 3: Verify and Wait for Approval
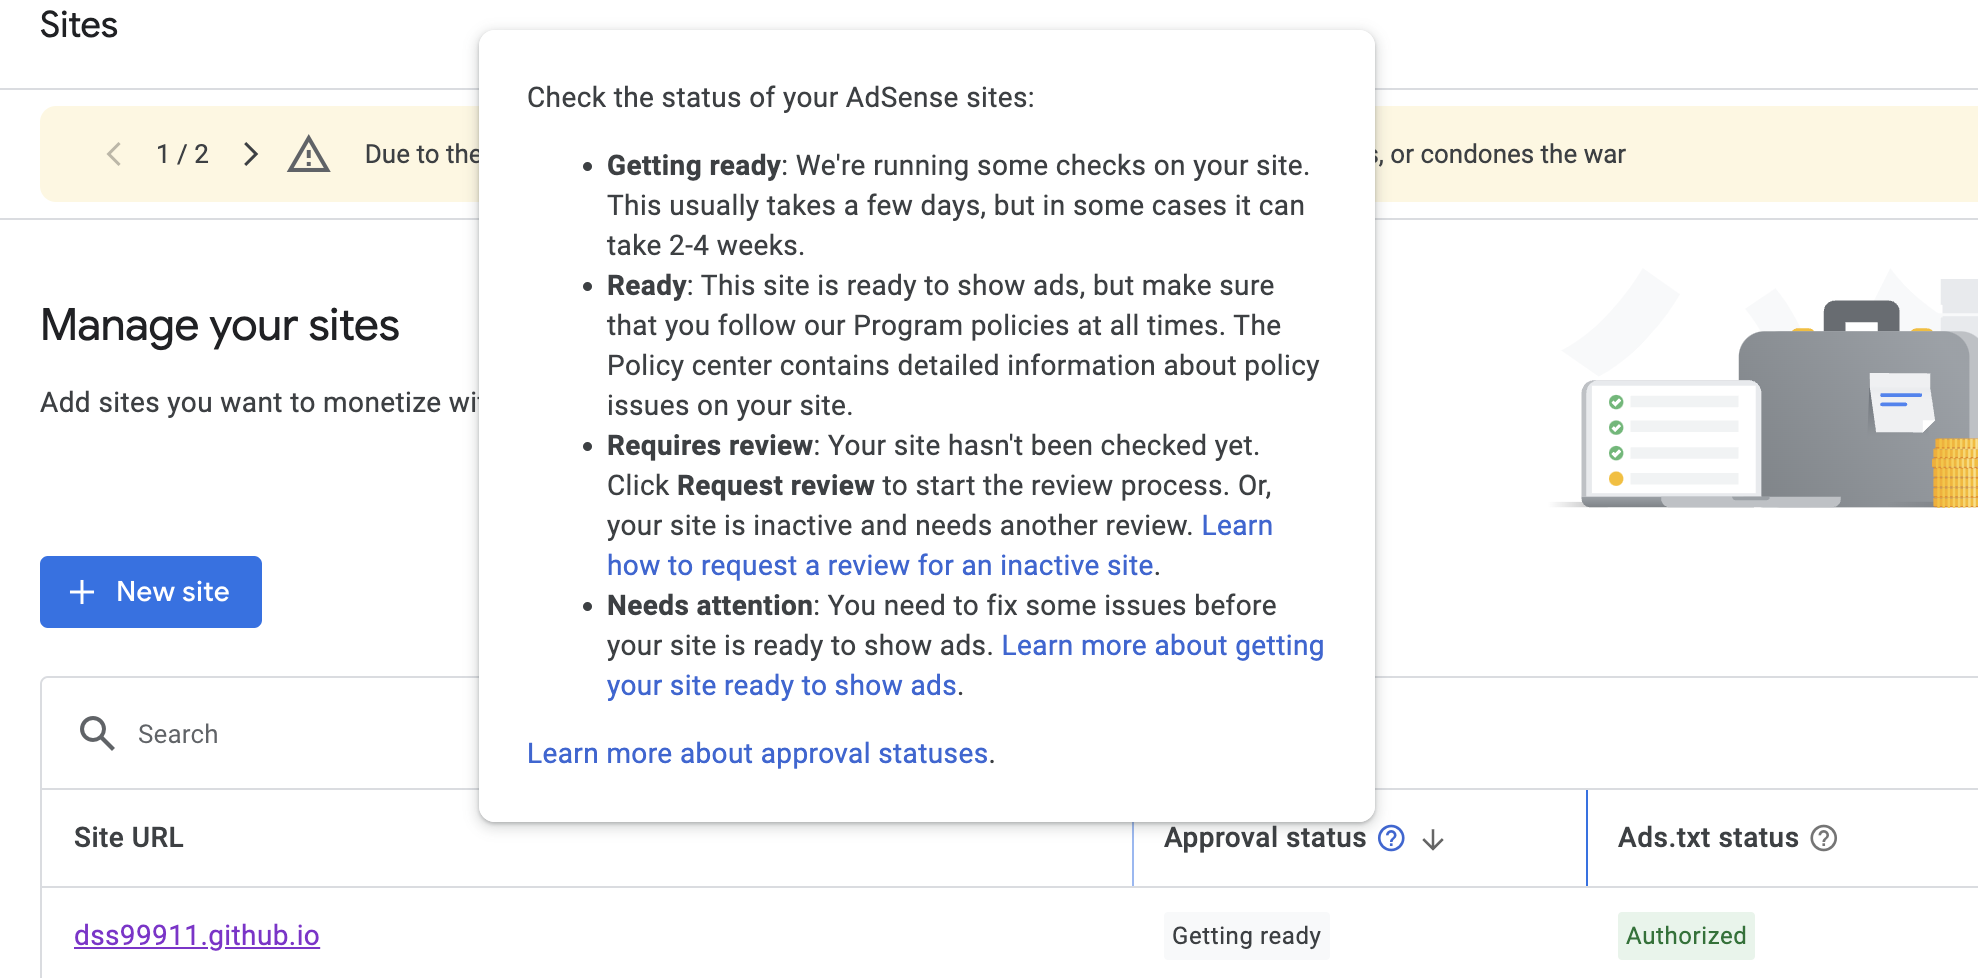 If the status of Ads.txt is
 Authorized and the Approval status is Getting Ready, then you’ve done a great job. Now, all you need to do is wait for AdSense’s review to be completed. This process can take anywhere from a few days to a few weeks. So, sit back and relax while AdSense does its work.
During the review process, Google checks your site for compliance with their program policies. Common reasons for rejection include insufficient content, policy violations, or navigation issues. If rejected, you can fix the issues and reapply.
Troubleshooting Common Issues
Ads Not Showing
- New site: It can take up to 48 hours for ads to start appearing after approval.
- Ad blocker: Make sure you disable your ad blocker when testing.
- Low traffic pages: AdSense may not serve ads on pages with very low traffic.
ads.txt Warnings
- Ensure the file is at the root of your domain, not in a subdirectory.
- Check for extra whitespace or formatting issues in the file.
- After deploying, verify it loads correctly by visiting
yourdomain.com/ads.txt.
Jekyll-Specific Considerations
- If you are using a custom
_config.ymlwithexcludedirectives, make sureads.txtis not excluded from the build. - For GitHub Pages deployments, the file should be in your repository root and will be served automatically.
Best Practices for Ad Revenue
- Content quality: Focus on creating high-quality, original content. Better content attracts more visitors and higher-paying ads.
- Page speed: Ensure your Jekyll site loads quickly. AdSense ads can impact load times, so optimize images and minimize JavaScript.
- Mobile optimization: With most traffic coming from mobile devices, make sure your theme is responsive and ads display properly on all screen sizes.
- Ad balance: Use AdSense’s Ad Balance feature to reduce the number of ads shown while keeping most of the revenue. This improves user experience.
And that’s it! You’ve successfully added auto ads from Adsense to your website. Happy monetizing!
Comments